
這篇主要是要來研究 Fields。
Intro.
在前兩篇可以看到,fields types 定義了 admin 可以如何輸入資料,例如 text, datepicker, upload button…等等。通常是給 Create or Update 使用。
在 Backpack 裡面,有很多的預設的 field types,也可以創建自己的 field。如果只是要做一點點修改,也可以 overwrite 原本的 field type 就好。
Fields API
在官網上列出了用於操作 fields 的一些方法。
這些 method 會在 operation 裡面運作,所以一定要放在 setupCreateOperation() 、 setUpdatePeration() or setup() 裡面。
(好像在 version 5 之後,也可以使用靜態的方式去 call,如 CRUD::addfield()。
// add a field
$this->crud->addField($field_definition_array);

// shorthand: add a text field
$this->crud->addField('db_column_name');

// add multiple fields
$this->crud->addFields([$field_definition_array_1, $field_definition_array_2]);

// change the attributes of a field
$this->crud->modifyField($name, $modifs_array);

// remove a field from both operations
$this->crud->removeField('name');

// remove multiple fields from both operations
$this->crud->removeFields($array_of_names);

// remove all fields from all operations
$this->crud->removeAllFields();

// FIELD ORDER

// add a field before a given field
$this->crud->addField($field_definition_array)->beforeField('name');

// add a field after a given field
$this->crud->addField($field_definition_array)->afterField('name');

// -------------------
// New in Backpack 4.1
// -------------------
// add a field with this name
$this->crud->field('price');

// change the type attribute on the 'price' field
$this->crud->field('price')->type('number');
Field Attributes
Mandatory Field Attributes
只有一個 attributes 是強迫要有的: name。
這個 name 會被怎麼使用?官網上提供了兩個:
- inside the inputs, as
<input name='your_db_column' />; - to store the information in the database, so your
nameshould correspond to a database column (if the field type doesn’t have different instructions);
Recommended Field Attributes
一個 field 也最好有以下的 field:
- the
nameof the column in the database (ex: “title”) - the human-readable
labelfor the input (ex: “Title”) - the
typeof the input (ex: “text”) 如果 label 被省略的話, backpack 會嘗試從name猜一下 label。
如果 type 被省略的話, backpack 會根據 column type 來猜,或是 Model 有一個名為 name 的 relationship。
Field Attributes for Presentation Purposes
有一些選擇性可用的 attributes 可以用在大部分的 default field types 上,可以讓人很簡單的達到一些效果:
[
    'prefix'     => '',
    'suffix'     => '',
    'default'    => 'some value', // set a default value
    'hint'       => 'Some hint text', // helpful text, shows up after the input
    'attributes' => [
       'placeholder' => 'Some text when empty',
       'class'       => 'form-control some-class',
       'readonly'    => 'readonly',
       'disabled'    => 'disabled',
     ], // change the HTML attributes of your input
     'wrapper'   => [
        'class'      => 'form-group col-md-12'
     ], // change the HTML attributes for the field wrapper - mostly for resizing fields
]
看起來蠻有用的,之前有用過 'prefix',可以加入前贅詞。
Fake Field Attributes (stores fake attributes as JSON in the database)
如果今天要存的資料有多種,但資料庫裡只有一欄,此時就需要先把資料轉成 JSON 格式再存進資料庫。
預設來說,會存在 extras 這個 column。
要使用 fake field attributes,有以下步驟:
- 在 field 裡面加入 fake attribute
[ 'name' => 'name', // JSON variable name 'label' => "Tag Name", // human-readable label for the input 'fake' => true, // show the field, but don't store it in the database column above 'store_in' => 'extras' // [optional] the database column name where you want the fake fields to ACTUALLY be stored as a JSON array ], - 在 model 裡面,要確認存 JSONs 的 db columns(default: extras) 有:
- In the
$fillableproperty; - on a new
$fakeColumnsproperty(create it now) - are cast as array in
$casts
- In the
Tab Attribute Splits Forms into Tabs
可以把 create/edit input 放在不同的 tabs 裡面。
 如果要使用這個功能,要在 field attribute 裡面加上 ’tab’。
舉例而言,如果我想要把
如果要使用這個功能,要在 field attribute 裡面加上 ’tab’。
舉例而言,如果我想要把 price 放在 test 這個 tab 裡面,然後把 articles 這個 select2_multiple 放在 hello 這個 tab 裡面,可以這樣寫:
CRUD::addField([
    'name'=>'price',
    'type'=>'number',
    'tab'=>'test'
]);
CRUD::addField([
    'type' => 'select2_multiple',
    'name' => 'articles', // the relationship name in your Model
    'entity' => 'articles', // the relationship name in your Model
    'attribute' => 'topic', // attribute on Article that is shown to admin
    'pivot' => true, // on create&update, do you need to add/delete pivot table entries?
    'tab'=>'hello'
]);
最後呈現出來的效果:
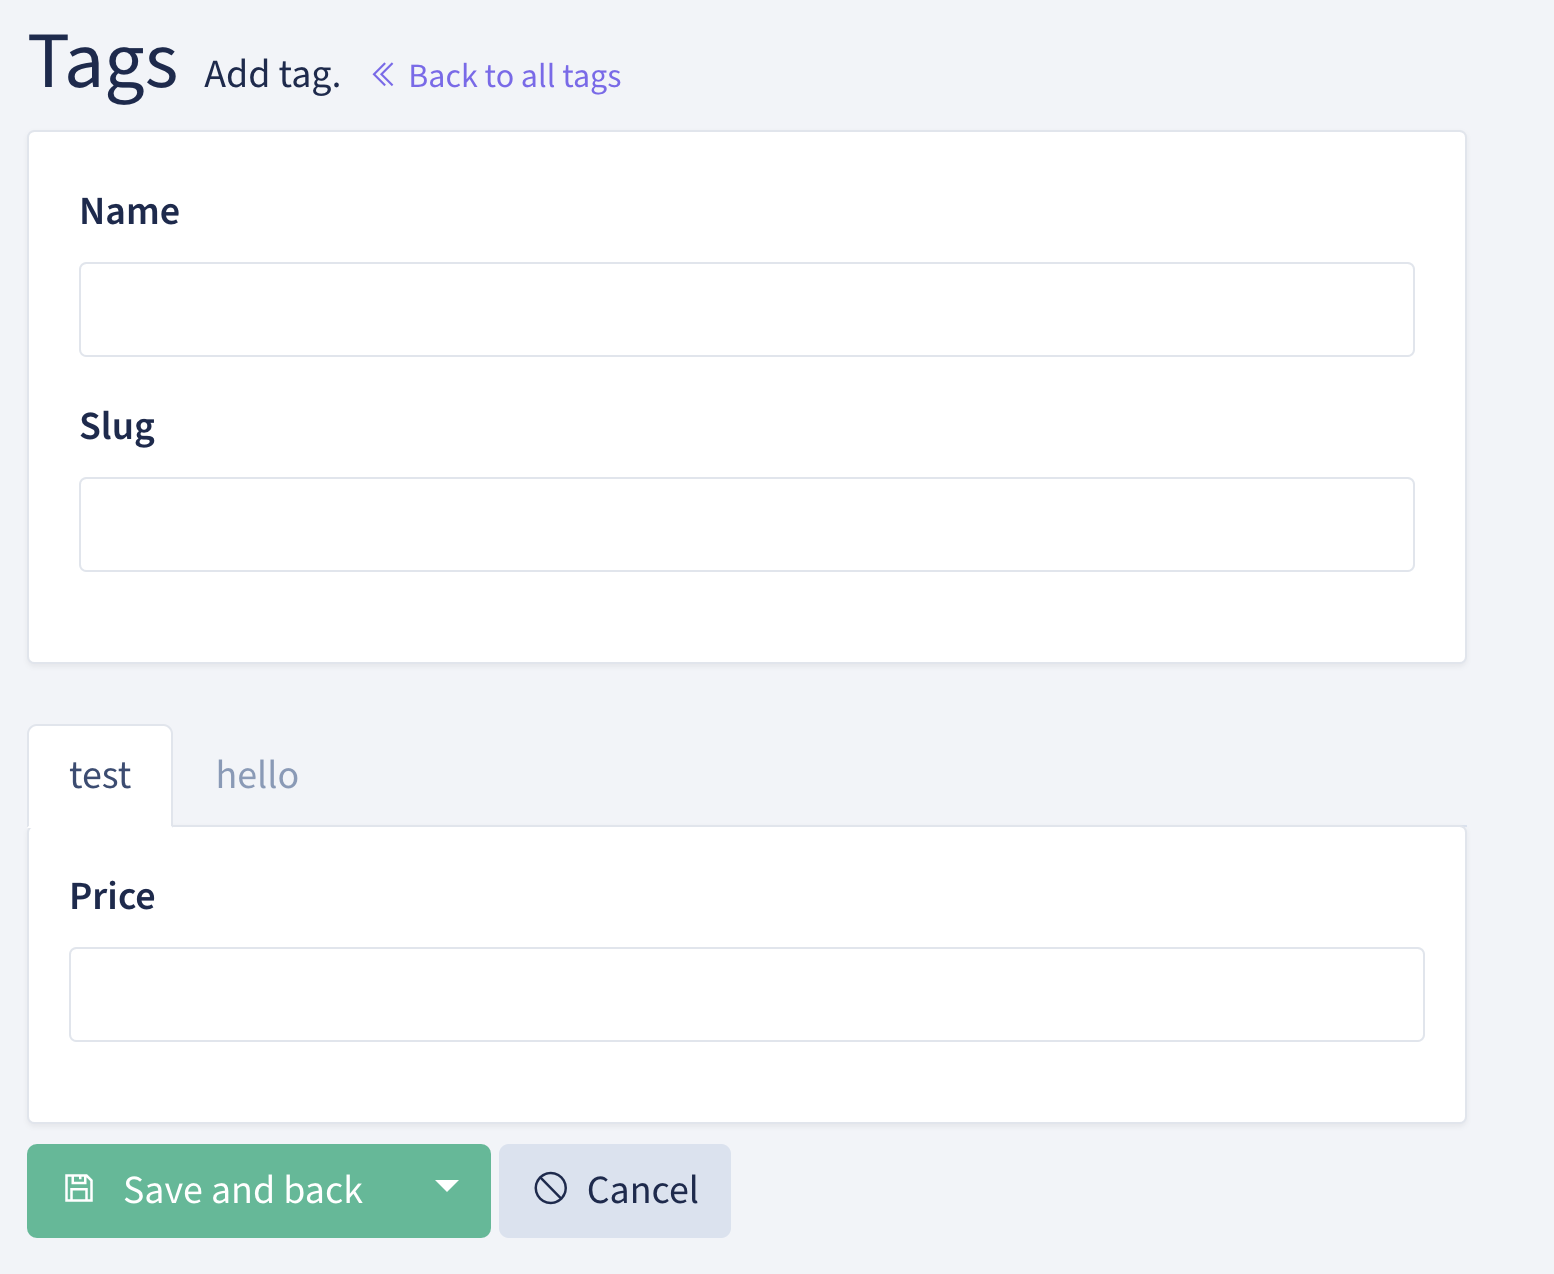
可以看到如果沒有指定 tab 的,會獨立是一個 component,放在所有 tabs 的上面。
Attributes For Fields Containing Related Entries
這邊主要是在說,如果 field works with related entities( relationships like BelongsTo , HasOne, HasMany, BelongsToMany, etc),有一些參數需要/可以設定。
entity- points to the method on the model that contains the relationship; having this defined, Backpack will try to guess from it all other field attributes; ex:categoryortags;model- the classname (including namespace) of the related model (ex:App\Models\Category); usually deduced from the relationship function in the model;attribute- the attribute on the related model (aka foreign attribute) that will be show to the user; for example, you wouldn’t want a dropdown of categories showing IDs - no, you’d want to show the category names; in this case, theattributewill bename; usually deduced using the identifiable attribute functionality explained below;multiple- boolean, allows the user to pick one or multiple items; usually deduced depending on whether it’s a 1-to-n or n-n relationship;pivot- boolean, instructs Backpack to store the information inside a pivot table; usually deduced depending on whether it’s a 1-to-n or n-n relationship;relation_type- text, deduced fromentity; not a good idea to overwrite;
其實看前幾天做的 select2_multiple 大概就可以知道怎麼用了。
很多個 field
文件後面就是各個不同的 field 介紹,這個就挑著記。
Relationship
會給 user 一個 select2 input,讓使用者可以選擇一個或多個關聯的 Eloquent Model 的 entires。
為了要正常運作,在 Model 裡面必須要正確定義 relationships。
在官網上有列出有支持的 relationships。
Load entries from AJAX calls - using the Fetch Operation
如果同時要 load 很多 entries,用 onpage Eloquent query 速度可能會很慢。
在這種情況下,可以叫 relationship field 透過 AJAX calls 來拿到 entries。
要達成這樣的效果,有以下步驟:
- Add
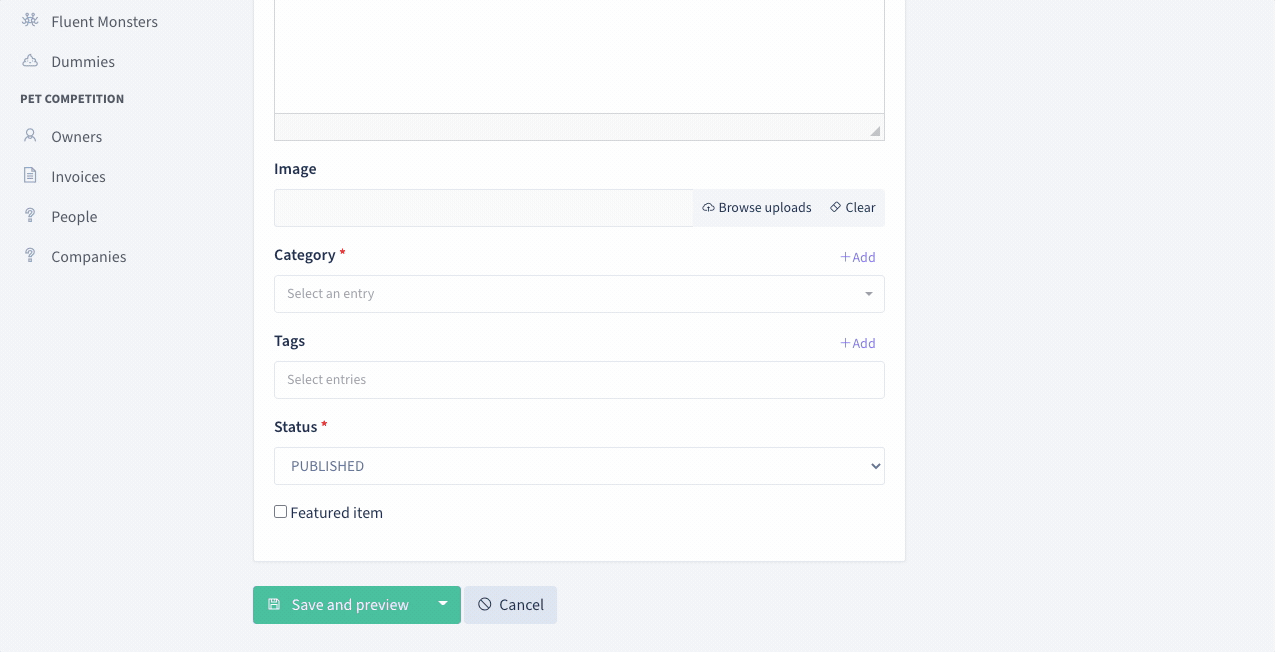
'ajax' => trueto your relationship field definition:主要應該是[ // relationship 'type' => "relationship", 'name' => 'category', // the method on your model that defines the relationship 'ajax' => true, // OPTIONALS: // 'label' => "Category", // 'attribute' => "name", // foreign key attribute that is shown to user (identifiable attribute) // 'entity' => 'category', // the method that defines the relationship in your Model // 'model' => "App\Models\Category", // foreign key Eloquent model // 'placeholder' => "Select a category", // placeholder for the select2 input // AJAX OPTIONALS: // 'delay' => 500, // the minimum amount of time between ajax requests when searching in the field // 'data_source' => url("fetch/category"), // url to controller search function (with /{id} should return model) // 'minimum_input_length' => 2, // minimum characters to type before querying results // 'dependencies' => ['category'], // when a dependency changes, this select2 is reset to null // 'method' => 'POST', // optional - HTTP method to use for the AJAX call (GET, POST) // 'include_all_form_fields' => false, // optional - only send the current field through AJAX (for a smaller payload if you're not using multiple chained select2s) ],'ajax'=>true這行。 所以我嘗試在ArticleCrudController.php裡面把原本的select2改掉:
    CRUD::addField([
        'label' => "Tags",
        'type' => 'relationship',
        'name' => 'tags', // the method that defines the relationship in your Model
        'entity' => 'tags', // the method that defines the relationship in your Model
        'attribute' => 'name', // foreign key attribute that is shown to user
        'pivot' => true, // on create&update, do you need to add/delete pivot table entries?
        'ajax'=>true
    ]);
此時應該是會報錯,看起來是根本沒有 router:

- 這時候就要到第二步驟,在
ArticleCrudController.php加入以下程式碼:這段程式碼的用途就是要開一個對應到 AJAX Calls 的 route 和 method。 會幫我們設定好use \Backpack\CRUD\app\Http\Controllers\Operations\FetchOperation; public function fetchTags() { return $this->fetch(\App\Models\Tag::class); }/fetch/tagroute,會導到fetchTags(),並 return 搜尋結果。 感覺蠻有趣的,[官方文件](FetchOperation docs)有說明更多關於怎麼 operation 怎麼運作的,不過先暫時跳過…
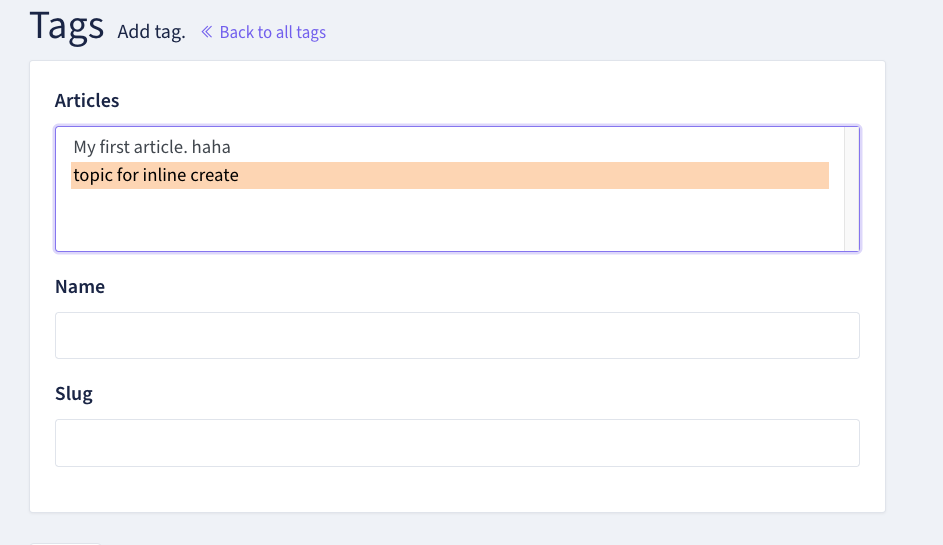
Create related entries in a modal - using the InlineCreate Operation
使用者去使用 AJAX 做搜尋,有可能根本沒有這個資料。
所以可能會需要讓使用者在不用離開原本的頁面下,新增一個 related entry。(e.g. 在 create article 的頁面新增一個 tag)
這個功能可以使用在 BelongsTo, BelongsToMany, MorphToMany relationships。
要使用這個功能,要先使用 Fetch operation 去拿到 entries。
然後再照以下步驟:
- 增加
inline_create在 field definition
    // for 1-n relationships (ex: category)
[
'type'          => "relationship",
'name'          => 'category',
'ajax'          => true,
'inline_create' => true, // <--- THIS
],
// for n-n relationships (ex: tags)
[
'type'          => "relationship",
'name'          => 'tags', // the method on your model that defines the relationship
'ajax'          => true,
'inline_create' => [ 'entity' => 'tag' ]  // <--- OR THIS
],
// in this second example, the relation is called `tags` (plural),
// but we need to define the entity as "tag" (singural)
這時候應該會看到以下 bug,跟上面的 fetch 一樣,目前還沒有 route 可以處理這個請求。所以要進入第二步驟。
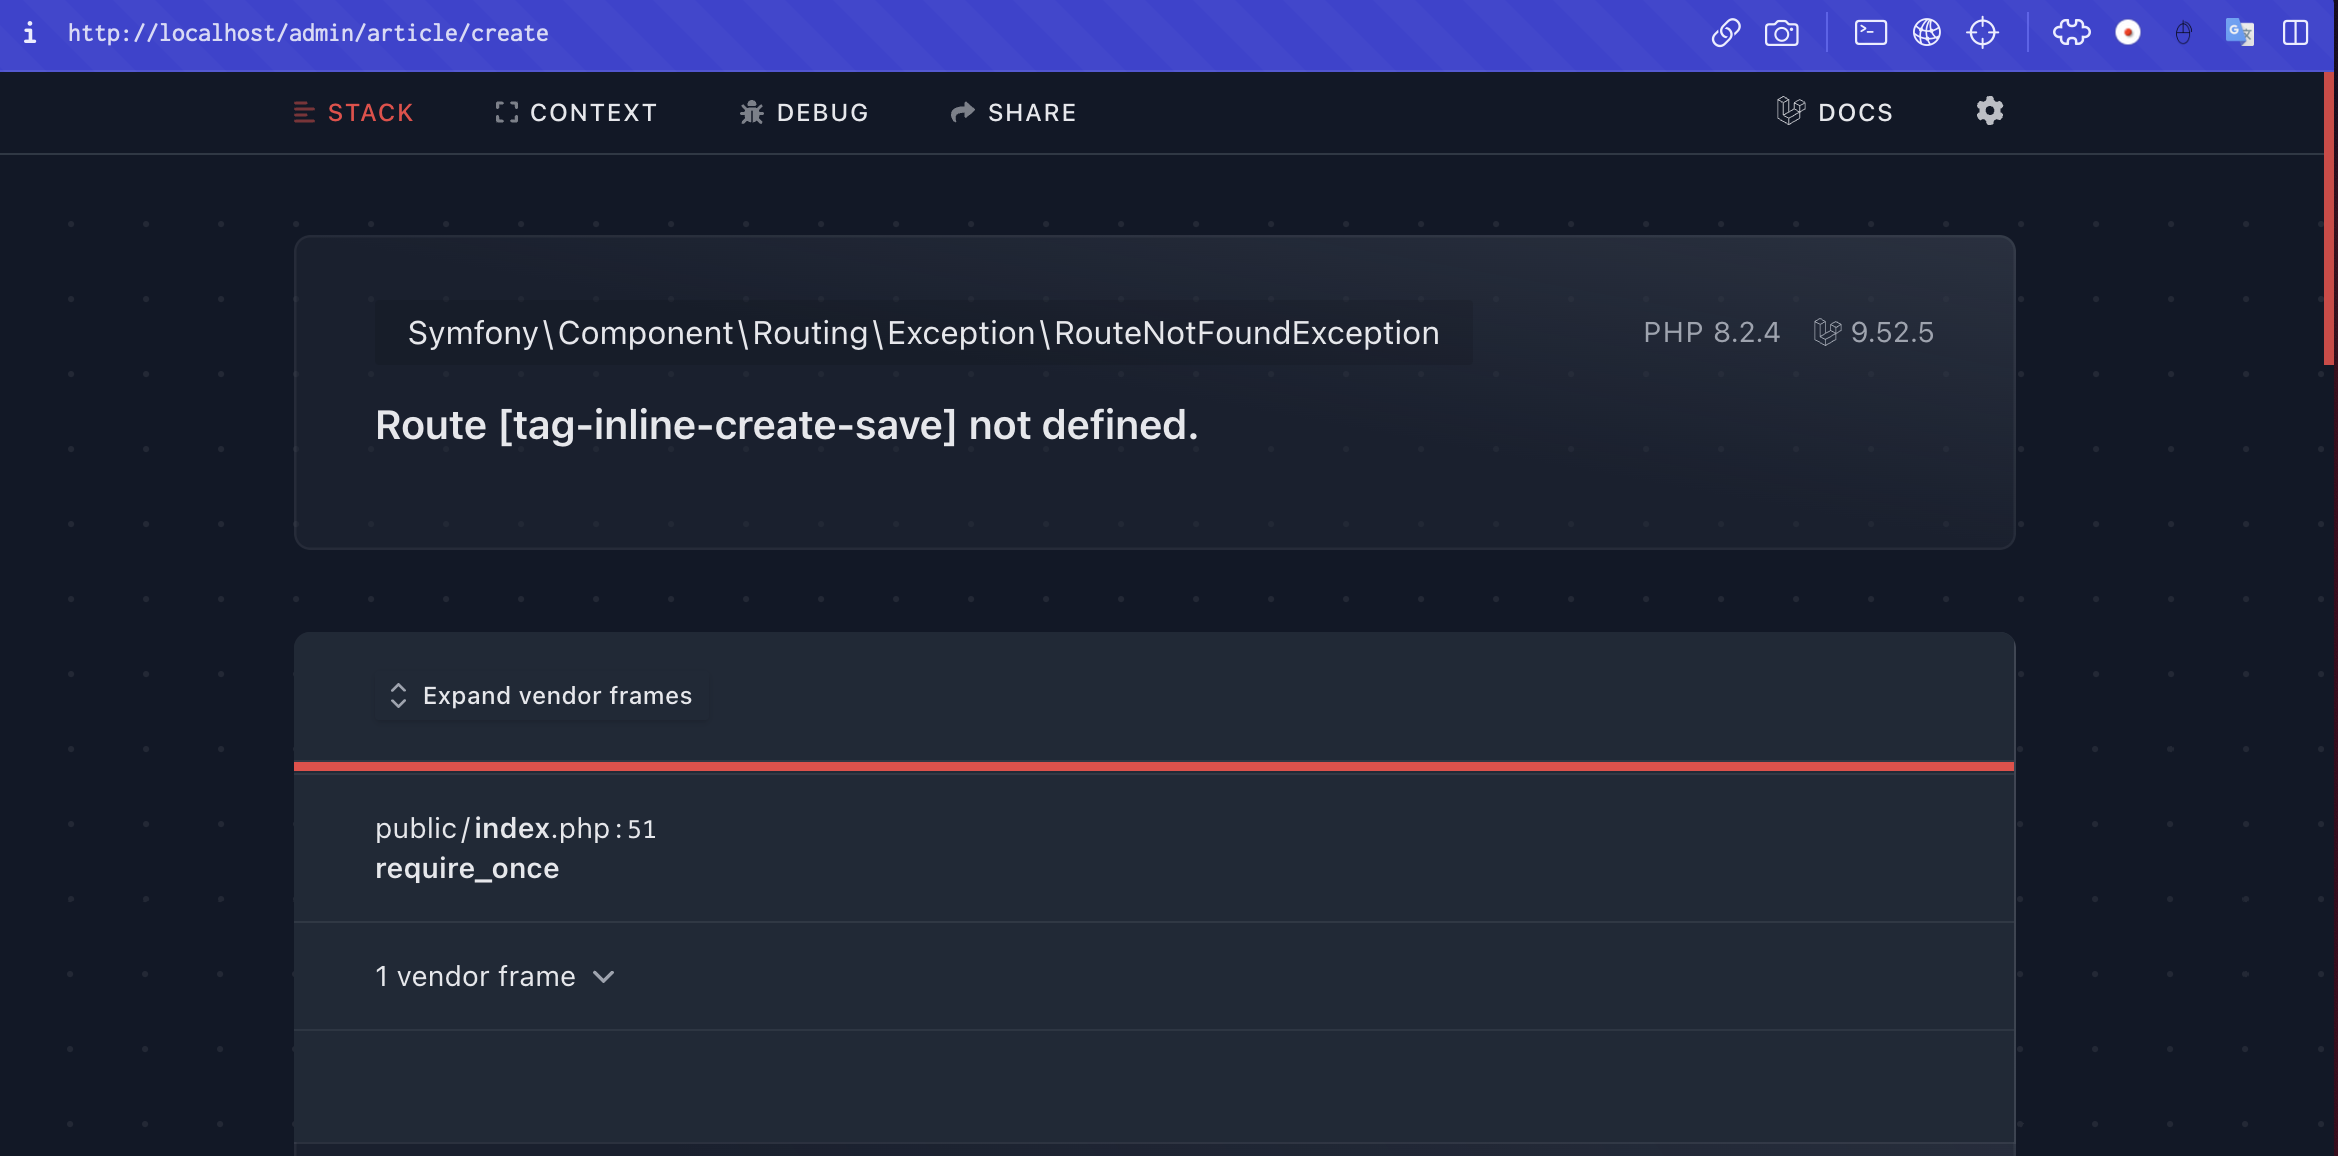 2. 要在 secondary entity (在這個例子中是 TagCrudController)中 use InlineCreate operation
    class TagCrudController extends CrudController
 {
     use \Backpack\CRUD\app\Http\Controllers\Operations\InlineCreateOperation;

    // ...
 }
加入之後看 artisan route:list 就會看到 backpack 幫我們生成一個 route 了:
GET|HEAD admin/tag/create ....................... tag.create › Admin\TagCrudController@create
POST admin/tag/inline/create tag-inline-create-save › Admin\TagCrudController@storeInlin…
POST admin/tag/inline/create/modal tag-inline-create › Admin\TagCrudController@getInline…
```
`InlineCreateOperation` 會讓 modal 顯示和 Create Operation 一樣的 field。
#### Save additional data to pivot table
對於有 pivot table 的 relationship(n2n: `BelongsToMany`, `MorphToMany`),這個 pivot table 除了 foreign key 之外,還可能包含其他列。
`relationship` field 提供了一個快速的方法,讓 admin 可以編輯這些 "extra attributes" 。
舉例而言,如果有以下 db tables:
```php
// - companies: id, name
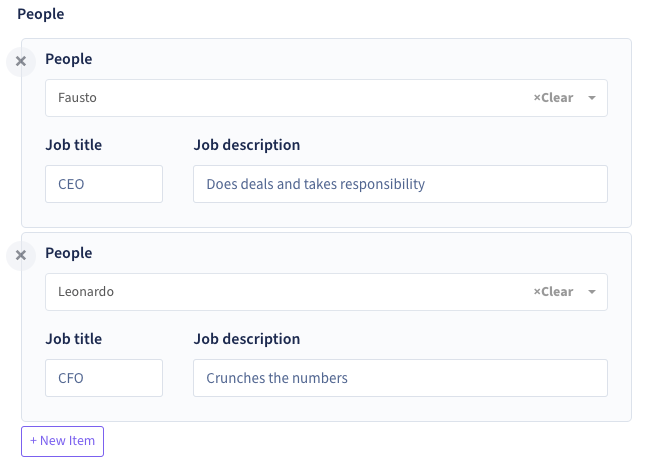
// - company_person: company_id, person_id, job_title, job_description
// - persons: id, first_name, last_name
在 company_person 這個 pivot table 裡面,我們可能想要讓 admin 去編輯特定使用者的 job_title 或是 job_description 。如下圖:
步驟如下(在這裡就不實作ㄌ):
- 在 model 裡面,確認 pivot 有被 define(使用
withPivot()):
// inside the Company model
public function people()
{
    return $this->belongsToMany(\App\Models\Person::class)
                ->withPivot('job_title', 'job_description');
}
// inside the Person model
public function companies()
{
    return $this->belongsToMany(\App\Models\Company::class)
                ->withPivot('job_title', 'job_description');
}
- 在
relationshipfield defintion, 加入subfield
// Inside PersonCrudController
[
    'name'          => 'companies',
    'type'          => "relationship",
     // ..
    'subfields'   => [
        [
            'name' => 'job_title',
            'type' => 'text',
            'wrapper' => [
                'class' => 'form-group col-md-3',
            ],
        ],
        [
            'name' => 'job_description',
            'type' => 'text',
            'wrapper' => [
                'class' => 'form-group col-md-9',
            ],
        ],
    ],
],
Manage related entries in the same form (create, update, delete)
有時候對於 hasMany 和 morphMany relationships,secondary entry 高度依賴 primary entry,所以我們可能不想要在一個額外的懸浮式視窗來編輯這個 secondary entry。
Delete related entries or fall back to default
一般而言,當 admin 在 “select” 裡面移除了一個 relationship,只有 relationship 被移除,related entry 會保留。
但對於 hasMany 和 morphMany 來說,有時候我們可能也會想要移除一整個 relationship。
如下例:
// Inside ArticleCrudController
[
    'type'          => "relationship",
    'name'          => 'comments',
    // when removed, use fallback_id
    'fallback_id'   => 3, // will relate to the comment with ID "3"
    // when removed, delete the entry
    'force_delete'  => true, // will delete that comment
],
Repeatable
有時候我們可能想要給 admin 可以同時新增很多欄位。
比如說,在「台灣國家公園入園入山申請」之中,可以按下「新增隊員」,就可以新增很多欄位 (for 這個隊員)。
這個時候就可以用到 repeatable。
從 backpack v5 版本開始,repeatable 會 return array,會需要在 model 裡面設定 cast 成 json,再存成資料庫。
可以按下 “New item” 按鈕,就會增加新的 subfields group(e.g. 一個新隊員)。
大部分的 field type 都可以用在 field group 裡面,也可以使用 wrapper 更改每個 field 的寬度。
但有以下事情是需要注意的:
- 所有在 group 裡面的 subfields 都需要定義清楚,Backpack 不會幫忙猜 Label 之類的。
- 有些 field type 是不可以在 subfield 使用的,例如 relationship field、upload、upload_multiple
- Validation: 可以透過 Laravel nested array validation 的方式來驗證 subfield 的資料。e.g.
testimonial.*.name => 'required' - Filed usage and relationships: 不能在 repeatable field 裡面再塞一個 repeatable field。
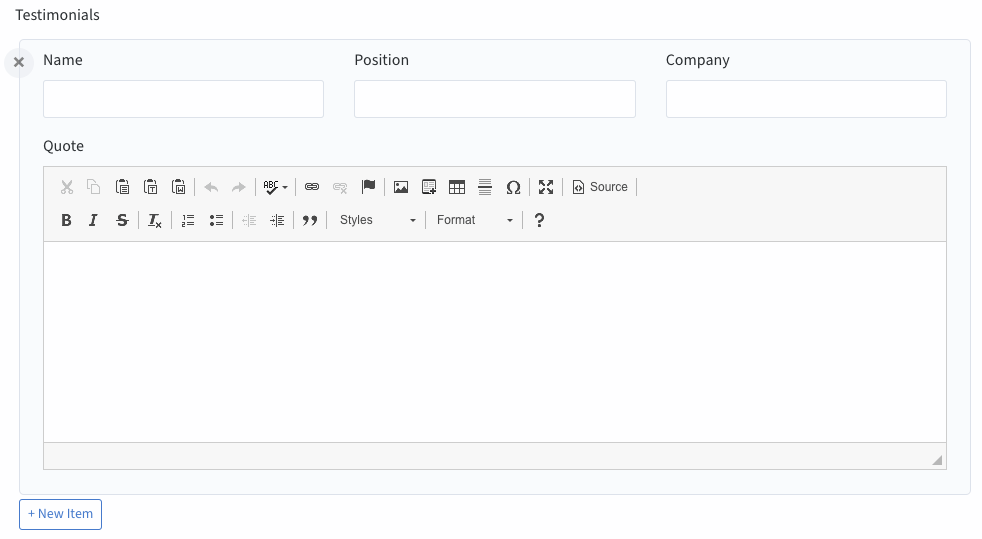
[   // repeatable
    'name'  => 'testimonials',
    'label' => 'Testimonials',
    'type'  => 'repeatable',
    'subfields' => [ // also works as: "fields"
        [
            'name'    => 'name',
            'type'    => 'text',
            'label'   => 'Name',
            'wrapper' => ['class' => 'form-group col-md-4'],
        ],
        [
            'name'    => 'position',
            'type'    => 'text',
            'label'   => 'Position',
            'wrapper' => ['class' => 'form-group col-md-4'],
        ],
        [
            'name'    => 'company',
            'type'    => 'text',
            'label'   => 'Company',
            'wrapper' => ['class' => 'form-group col-md-4'],
        ],
        [
            'name'  => 'quote',
            'type'  => 'ckeditor',
            'label' => 'Quote',
        ],
    ],

    // optional
    'new_item_label'  => 'Add Group', // customize the text of the button
    'init_rows' => 2, // number of empty rows to be initialized, by default 1
    'min_rows' => 2, // minimum rows allowed, when reached the "delete" buttons will be hidden
    'max_rows' => 2, // maximum rows allowed, when reached the "new item" button will be hidden
    // allow reordering?
    'reorder' => false, // hide up&down arrows next to each row (no reordering)
    'reorder' => true, // show up&down arrows next to each row
    'reorder' => 'order', // show arrows AND add a hidden subfield with that name (value gets updated when rows move)
    'reorder' => ['name' => 'order', 'type' => 'number', 'attributes' => ['data-reorder-input' => true]], // show arrows AND add a visible number subfield
],
select2 系列
如同官方的敘述:
Works just like the SELECT field, but prettier.
select 系列基本上會把全部選項列出來,如果要多選還要按著 shift。
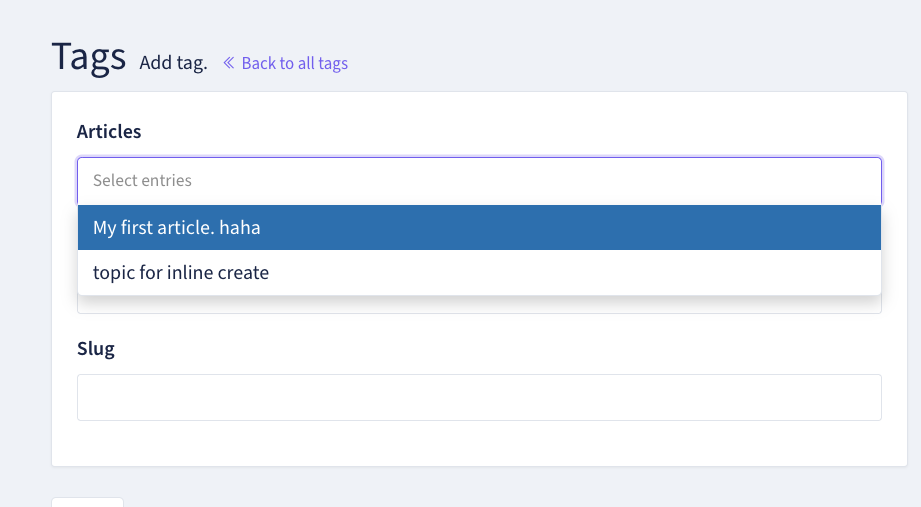
select2 系列看起來就比較美觀,是類似 dropdown 這樣:
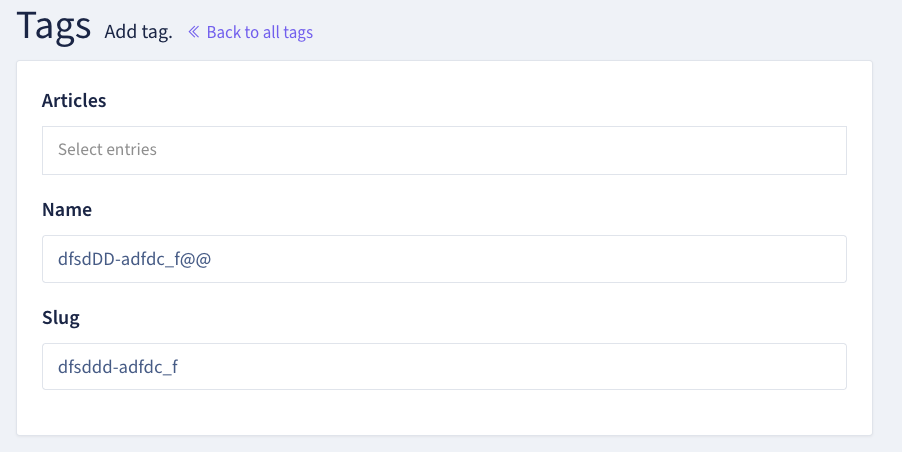
Slug
Slug 看起來也蠻特殊的,可以在網頁直接把文字動態轉為符合網址的格式。 使用方式如下:
CRUD::field('name');
CRUD::addfield([
    'name'=>'slug',
    'target'=>'name',
    'label'=>'Slug',
    'type'=>'slug'
]);
效果會如下(是動態的,但這裡用圖片示意):
如果不想要是動態的,也可以將他暫停掉:
    protected function setupUpdateOperation()
    {
        $this->setupCreateOperation();

        // disable editing the slug when editing
        $this->crud->field('slug')->target('')->attributes(['readonly' => 'readonly']);
    }
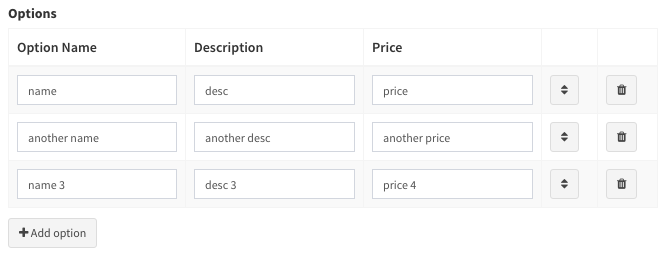
Table
Table 感覺也是工作上會常常用的。 使用 Table 的話,會允許 multiple input,並把這些 input value 存成 JSON。
[   // Table
    'name'            => 'options',
    'label'           => 'Options',
    'type'            => 'table',
    'entity_singular' => 'option', // used on the "Add X" button
    'columns'         => [
        'name'  => 'Name',
        'desc'  => 'Description',
        'price' => 'Price'
    ],
    'max' => 5, // maximum rows allowed in the table
    'min' => 0, // minimum rows allowed in the table
],
做出來會如下圖:
 )
)
[!note] 記得要在 model 設定 casting。
Overwriting Default Field Types
Backpack 的 field types 通常都存在 resources/views/fields。
如果需要修改已經存在的 field,不用特別去改 package,只需要在 /resources/views/vendor/backpack/crud/fields 新增一個有同樣名字的 view。Backpack 會優先確認那裡有沒有檔案,如果沒有檔案才去 load package。
可以使用 php artisan backpack:field --from=field_name 來新增一個 field blade file,backpack 會幫忙新增。可以對新增完的檔案進行修改:
{{-- number input --}}
@include('crud::fields.inc.wrapper_start')
<label>{!! $field['label'] !!}</label>
@include('crud::fields.inc.translatable_icon')
@if(isset($field['prefix']) || isset($field['suffix'])) <div class="input-group"> @endif
@if(isset($field['prefix'])) <div class="input-group-prepend"><span class="input-group-text">{!! $field['prefix'] !!}</span></div> @endif
<input
type="number"
name="{{ $field['name'] }}"
value="{{ old_empty_or_null($field['name'], '') ?? $field['value'] ?? $field['default'] ?? '' }}"
@include('crud::fields.inc.attributes')
>
@if(isset($field['suffix'])) <div class="input-group-append"><span class="input-group-text">{!! $field['suffix'] !!}</span></div> @endif
@if(isset($field['prefix']) || isset($field['suffix'])) </div> @endif
{{-- HINT --}}
@if (isset($field['hint']))
<p class="help-block">{!! $field['hint'] !!}</p>
@endif
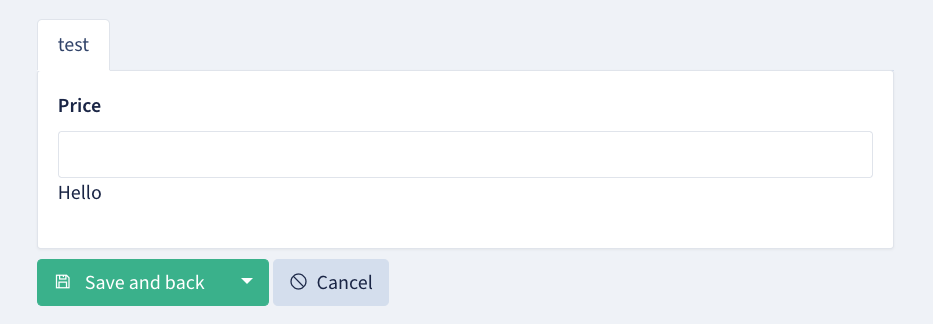
Hello
@include('crud::fields.inc.wrapper_end')
像我在 number field type 的最後面加了一個 Hello,雖然沒什麼意義,但可以看一下效果:
Creating a Custom Field Type
也可以自己創建一個新的field type,可以用以下指令:
// to create one using Backpack\Generators, run:
php artisan backpack:field new_field_name

// alternatively, to create a new field similar an existing field, run:
php artisan backpack:field new_field_name --from=old_field_name
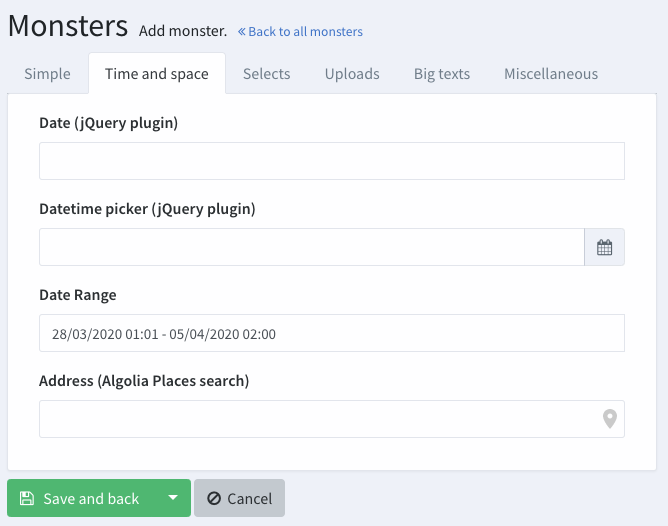
Field Defintion 可能會像:
[   // Custom Field
    'name'  => 'address',
    'label' => 'Home address',
    'type'  => 'address'
    /// 'view_namespace' => 'yourpackage' // use a custom namespace of your package to load views within a custom view folder.
],
當然,我們也可以自己編輯 blade file。在這個 custom field type,可以用幾個變數:
$crud- all the CRUD Panel settings, options and variables;$entry- in the Update operation, the current entry being modified (the actual values);$field- all attributes that have been passed for this field;
結語
這篇文件蠻詳盡的介紹了 fields,從一開始介紹 attributes,到中間列出幾乎所有的 fields,最後介紹客製化。